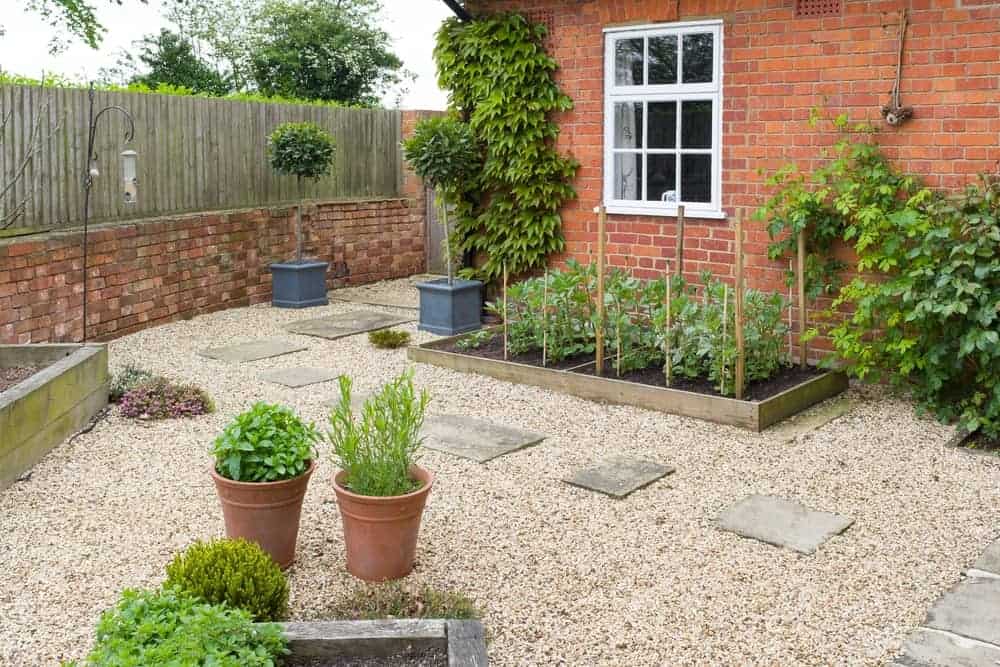
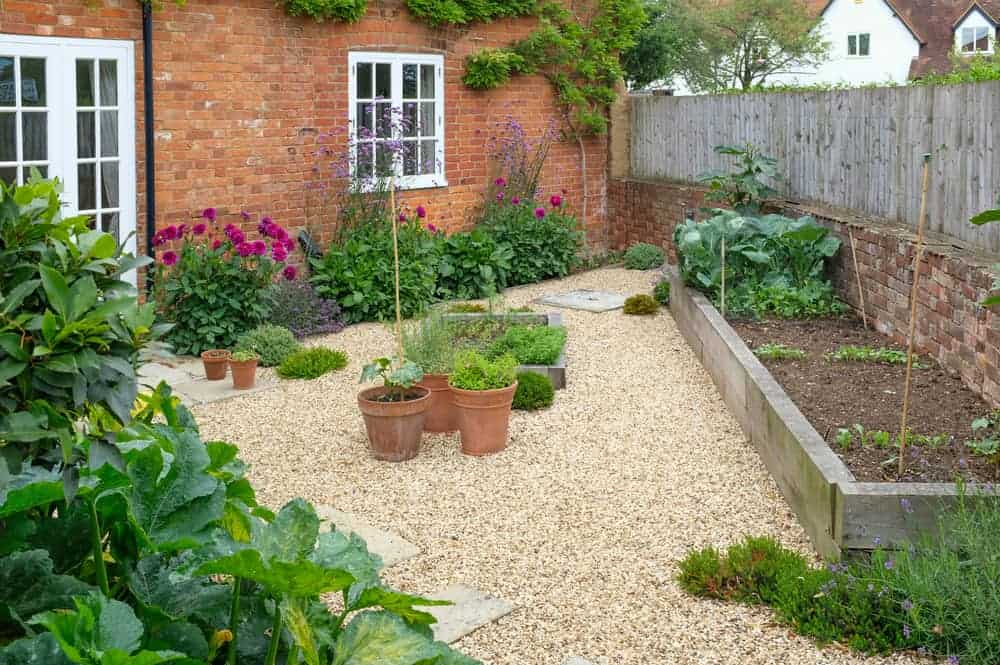
An inviting patio is an ideal spot for a bit of outdoor leisure time with friends and family. But with the cost of paving and decking materials, many homeowners are choosing gravel as an affordable and durable alternative.
Installing a gravel patio is also something you can do yourself. So, if you’re interested in laying a gravel patio, follow the guidelines below.
Tools & Materials For Laying A Gravel Patio
You will need the following materials to lay your gravel patio:
An aggregate for the sub-base
A layer of weed membrane material (where necessary, for drainage and weed control)
Your choice of gravel for the patio surface
These are the basic tools you will need to lay a gravel patio:
A pair of heavy-duty work boots and rugged work gloves
Wheelbarrow – for easier moving of supplies
A garden shovel – for applying the aggregate/gravel
Garden Rake – for distributing the aggregate
Wacker Plate – for compacting the gravel
How Much Does It Cost To Lay A Gravel Patio?
A gravel patio is not only an affordable option, but it also offers easy and minimal maintenance. When correctly applied, gravel can look every bit as attractive as paving. So how much will it cost, and how do you calculate this?
Measure the width and length of your patio area. Multiply these measurements to obtain the square metre measurement. Once you have your patio’s floor surface measurements, you can calculate the cost of the project.
The average patio used for entertainment is 50 square meters, but some of you may have much smaller outdoor areas.
These are the estimated costs you can expect for your gravel patio project. Final costs are, however, dependent on your choice of gravel and whether or not you lay down a membrane layer:
Small patio of 10 square metres: £240 – £400
Medium-sized patio of 25 square metres: £360 – £600
Larger patio/entertainment area of 50 square metres: £720 – £1200
If you decide to include a membrane layer for better drainage, you can purchase our weed control fabric for £19.99 for 10 square metres, £39.98 for 25 square metres, and £59.97 for 50 square metres.
To work out how much gravel you’ll need to cover your area, you can use our gravel calculator. This will give you an idea of how many bags of gravel you’ll need and from there you can work out the total cost of your gravel.
Step-By-Step Guide For Laying A Gravel Patio
Once you have obtained all the materials and tools listed above, proceed with steps one through five below.
Please ensure that you wear safety or work boots and protective gloves when operating the wacker plate machine. This will keep you safe from accidental injury.
A dust mask is also advised when tackling this type of project.
Step 1: Choose Your Gravel
Choosing your gravel is probably the hardest part, as there are so many types, colours and sizes to choose from.
A hardy aggregate in a 20mm chipping, like our rounded Yorkshire Gold Gravel, is best for high-traffic zones that may also carry a bit of weight, like footpaths and around patio fire pits.
But you may prefer finer chipping for your patio surface. Our 14mm-chipping brown and cream-coloured gravel, in both a smooth and angular finish, is a great option. Its delicate colour will lend your patio an elegant look.
Step 2: Prepare Your Patio For The Project
Remove all patio furniture and other moveable items that sit on your patio, like potted plants. Then remove any existing decking, tiles, or other floor covering on your patio.
Use the shovel, if necessary, to remove existing material. Allow enough depth to lay two aggregate layers 50mm deep. This will ensure your patio surface isn’t too raised.
Step 3: Create A Sub-Base
Establish the lower level of your gravel patio with a bulk fill aggregate material. Laying this sub-base layer will give your gravel patio a stable foundation to withstand constant foot traffic.
Scoop up the aggregate from your wheelbarrow with your shovel, and deposit it onto the patio surface. Compact this layer with the wacker plate machine.
This is an item of construction equipment with a vibrating metal base plate and an engine. The wacker plate machine makes it easier to form a compact, level surface. You can generally hire one from tool hire depots.
Our bulk bags of Crusher Run can be used for the sub-base. The sub-layer should be at least 50mm deep for best results.
Step 4: Use A Weed Membrane (Optional)
Laying a weed membrane layer not only blocks weeds but can also help with drainage. We strongly recommend it because it helps rainwater drain through your gravel instead of forming a pool on your patio.
Our durable weed control fabric is available in packs of 2×10 m rolls of polypropylene.
Cut the sheets as necessary to fit the dimensions and shape of your patio. Lay these sheets over the compacted sublayer of aggregate.
Step 5: Lay The Gravel Of Your Choice
Distribute your choice of gravel over the sub-base or weed membrane layer. Smooth it out with the garden rake.
The gravel layer should be about 50mm deep once you have finished distributing it across your patio surface. Make sure that it is completely even before replacing the patio furniture.
For added style, finish the look with a border of our rockery stones around a collection of potted plants.
Maintenance Of Your Gravel Patio
Laying a gravel patio is a very simple project when you have the right tools. And keeping your gravel patio looking good is a breeze, too. Gravel is easy to replace and even easier to keep clean!
Simply sweep it with a yard broom to remove fallen leaves and debris. Keep it clean with an occasional rinse from a power washer. A few seconds is all it takes.
Final Thoughts
With the simple step-by-step guide above, anyone can lay a gravel patio on a weekend afternoon. Even those not accustomed to DIY can easily manage this home improvement project.
Once you’re done, all that’s needed are a few decorative plants hemming the border or any other outdoor feature you prefer.
Transforming your front garden into a gravel-based landscape offers a blend of elegance and practicality, appealing to homeowners seeking a low-maintenance yet aesthetically pleasing outdoor space.
As we embrace the fresh start of a new year this January, it’s the perfect time for garden enthusiasts across the UK to start planning and dreaming about their outdoor spaces.
Comms could be better should ring 24hrs before delivery driver was excellent.
Very pleased with the bird house, excellent quality and arrived very quickly.Ty
Arrived on the day specified and the delivery driver was very helpful
Speedy delivery. Well packaged. Good quality product. Thank you
Online Gravel Calculator
1
2
3
Pre pack bags
0
Bulk bags required
0
*This calculator is only intended as a rough guide to help you approximate the likely volume of gravel, slate or other aggregates needed for your project.
This website uses cookies so that we can provide you with the best user experience possible. Cookie information is stored in your browser and performs functions such as recognising you when you return to our website and helping our team to understand which sections of the website you find most interesting and useful.
Strictly Necessary Cookies
Strictly Necessary Cookie should be enabled at all times so that we can save your preferences for cookie settings.
3rd Party Cookies
This website uses Google Analytics to collect anonymous information such as the number of visitors to the site, and the most popular pages.
Keeping this cookie enabled helps us to improve our website.
Please enable Strictly Necessary Cookies first so that we can save your preferences!
